Starlink Restaurant Installation Procedures
Pre-requisites
You will need several things to complete the installation of the Starlink unit and connection to the stores network:
· The Starlink unit including the Dish w/mount, Power supply, and 3 cables. (Shipped to site ahead of time in a large Pelican case)
· The official Starlink app (available for Android or iOS)
· Roof Access – This can be simple as climbing an existing ladder or it could be difficult to access the roof due to other circumstances (Mall site, shared roof with other businesses, etc.).
Each store may have a different layout so the following may not be required for every install, but are recommended in case they are needed:
· Rope or other cordage. – This can be necessary to gain roof access or to raise the Starlink dish to the roof.
· Sandbag or another object to weigh down the base of the dish.
· Cable running tools.
· Tape or other fasteners for securing cables.
· Drill w/screws – For mounting the power supply.
· Hole Saw
· Exterior Junction box and sealant – This and the hole saw are for if a viable entry on the roof is not available. Rather than make a new roof penetration, we would prefer a hole cut into the side of the building, if possible, covered with an exterior junction box, and sealed.
Installation
For most of the setup instructions, follow the Setup Guides available through the Starlink App. The systems we use are the High Performance Starlink Kit (with the 4-leg base) and the Flat High Performance Starlink Kit (with the wedge mount base). There are some details not included in those Setup Guides that are specific to installation in our stores, which need to be considered:
Dish Placement and Cable Entry
The dish should be installed on the roof of the store. The Setup Guide will tell you that the dish will need to be clear of obstructions so consider that when placing the dish. This can include trees and tall buildings.
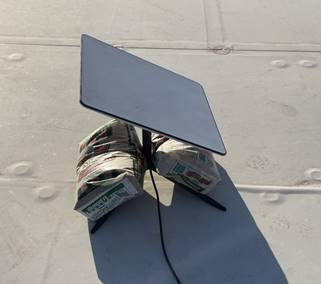
The base of the dish will need to be secured so wind cannot disrupt the stores Starlink connection. With the High-Performance Kit, this can be done with sandbags on the legs of the base, as pictured below: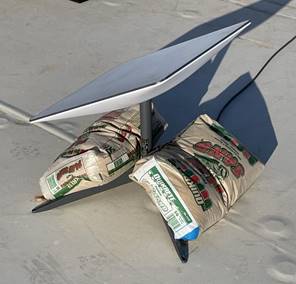
The Flat High-Performance kit has a wedge mount and can be place flat on the roof of the store secured to a concrete block. This is a landscaping tile used in these examples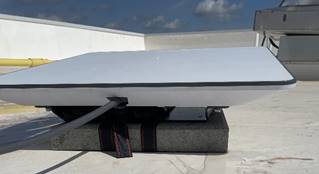
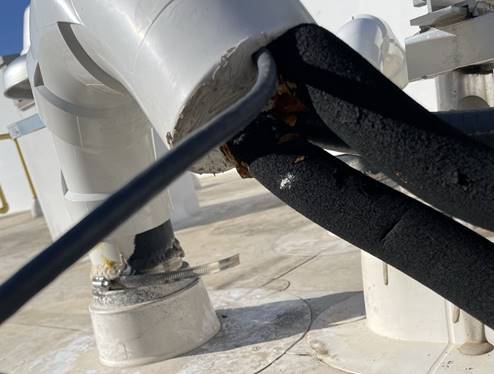
The cable from the dish to the Power Supply can be brought into the store several ways:
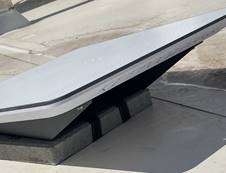
· Existing roof penetration points – Newer stores will have a dedicated roof entry point for several pieces of equipment. Older stores that don’t have it may still be able to come in through another existing penetration, for example the one for the A/C condenser tubes, as pictured below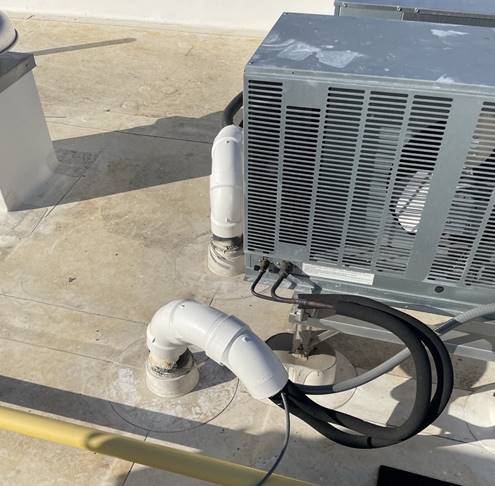
· Existing or New exterior junction boxes – If no existing roof penetration is available, rather than create a new one, we would like to see entry on the side of the building that can be covered with an exterior junction box and sealed. This could require special hardware for penetrating the exterior of the store all the way to the interior. Placement of this should be considered to make it as close as possible to the network equipment to which it needs to be connected.
Internal Placement and Connection
Inside the restaurant, the Power supply should be placed as close to the networking equipment as possible, but also close enough to the Uninterruptable Power Supply so it can be connected to that. The network cable that comes from the power supply should be connected to the network where the Primary ISP usually would be, normally this is labelled ISP 1.
No comments to display
No comments to display